Tuesday, June 30, 2015

Kawaii Checkered Strawberry Nail Tutorial~

Hey hey hey~
Today I've got something out of the usual... a nail art tutorial!
I haven't done one of these before, but I figured I would.
In eighth grade I was absolutely obsessed with doing nail art (first year of highschool too), and I thought I'd try it again, since it's been quite a while- I rarely paint my nails nowadays.
This is a look (if you can really call it that?) that I think is super cute for the summer, because of the strawberries and sparkles~ It's relatively simple, and doesn't require toooo much coordination (in my opinion).

Let's start!

Start with clean nails! Shape them however you want, either using a nail file or nail scissors.
I also suggest pushing back the cuticle using a cuticle pusher thing~

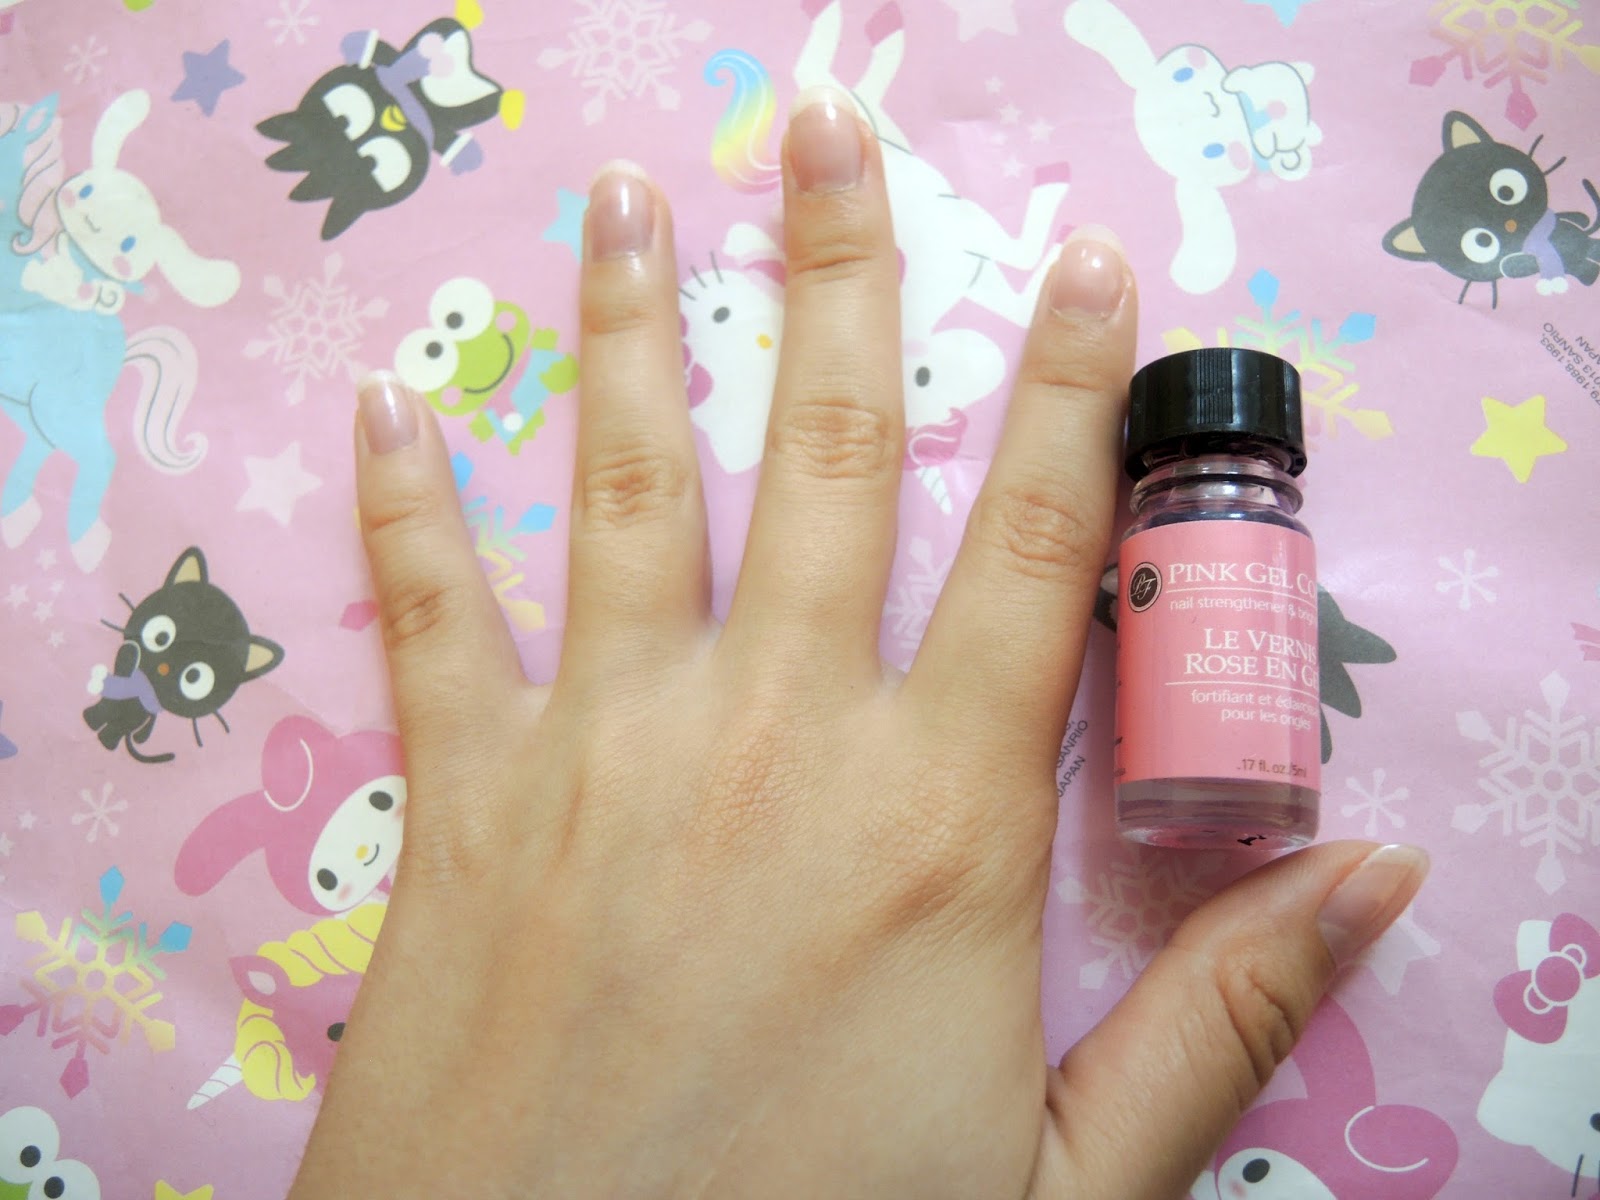
Apply a base coat- this will protect your nails. The one I'm using is the 'Pink Gel Coat' by Perfect Formula (they sell it at Sephora, if you're curious). I really like this top coat because it adds a slightly pinkish sheen to your nails, which looks really cute~
For creating the checkerboard technique, I'm using tape as my helper! Using tape really helps to keep things neat. Since the tape I use is clear, it's a bit difficult to see which part of my nail has tape or doesn't- the part where the blue arrow is pointing does not~ By blocking off the other sections, you guarantee that you'll have a nice, neat line where you took off the tape~
Put nailpolish on the exposed part of the nail- it's okay if you go over onto the tape. After ten seconds, remove the tape (you don't want to wait too long- otherwise the nail polish might be removed where you want it to stay).
Repeat for the rest of your nails! The color I used is Set in Stone, from Sally Hansen's "Hard as Nails" series.
I then repeated the steps for the opposite quadrant of my nails- just be sure that the first part you painted is dry before you put tape over it- otherwise the tape might tear off the lacquer, and that would be unfortunate.


Decoration time! I'm using rhinestones I got from a crafting store, as well as strawberry slices from a nail art wheel I got at Claires. You can add however much or however little you want to your nails- I didn't have enough strawberries to put them on each of my nails, so I just put one on my thumb and one on my ring finger (typical accent nails).
I decided to put rhinestones on each nail, but I didn't use the strawberries as much~
You can stop here, or you can go even further...
with glitter!
If you're curious, the two colors are Pantone's Elemental Energy Lacquer in "Air" and Revlon's Nail Art Moon Candy in "Satellite". One is more pinkish than the other, so I thought it'd be fun to use both~
Here's just a single coat of the nailpolish
I finished up with another coat of sparkly polish, added a topcoat (the same polish I used for the base, because I love the sparkly effect it has), and voila! That's it~

Anyways, I hope you guys liked this ^.^ I'm not a nail art expert in the slightest, but I thought it'd be fun to try something new and to show you guys how I do my nails~
Thanks for reading!
Ciao~

Wednesday, June 24, 2015

Milk Club Wishlist~

Hello everyone!
I hope you're all enjoying your summers!

Today I thought I'd do something different from the usual- a wishlist post!
Some of you may have noticed the 'wishlist' tab below my banner, but honestly I rarely update that, and they're sort of more long-term wishlist items (like lolita dream dresses, art books I want, etc.)
Recently however, I found a really cute Storenvy site called Milk Club!
They have a bunch of really cute fashion items, as well as beauty products, and other such cute things. They sell both brand new and used clothing items (though naturally all the beauty products are brand new). I'm pretty sure I have a cute addiction, so naturally I found a ton of things that I really want... 
I thought I'd compile everything here- maybe you'll also find something you like!

Let's start!
(Oh boy this is gonna be a massive wishlist... brace yourselves)

Kawaii Mystery Package
How could I resist this adorable mystery pack? As soon as I saw it was like Sakura you need me.
The mystery package comes with a cute outfit (either a dress or a skirt and a top), a bag or a wig, a pair of socks or tights, a bundle of Japanese accessories, a bundle of Japanese stationary, a bundle of Japanese candy (yum yum yum), and a makeup item (either Japanese or Korean Brand), as well as other stuff. For the $66 price, I think it's a pretty decent deal- the example photo of what you could get definitely looks worth the price.
I think it's great if you don't really have a lot of cute stuff, and you want to open the package and *boom* all of a sudden your entire life is cutified (at least, that's what I imagine would happen- no guaranties).
High Waisted Frilly Shorts
I only own one pair of shorts... which is sad. I like the aesthetic that these have- and they're high-waisted which is even better. The lace at the bottom is really cute, and I imagine these would be perfect for the summer (since I'll be moving to a much warmer climate, I figure something like this would be useful so I don't end up wearing dresses every single day of the rest of my life... though there's nothing wrong with that~).
Milky Peko Tee
I'm not quite sure why, but I've always wanted a t-shirt with one of these "milky" designs on it. I think it's cute and vintagey, and although t-shirts aren't really something I normally wear, it would be something cute and quirky for my lazier days when I don't feel like dressing up a lot. If the red is too stark for you, the shirt also comes in white and in black.
Sleeveless Crochet Collar Topshop Blouse
This is one of the items from Milk Club that is 2nd hand- so there's only one available. I think it's super duper cute~ I've always wanted something from Topshop, but their clothes are so expensive ;~; This blouse is really cute though- I think it'd be adorable with a skirt, or tucked into a pair of shorts for the summer. Isn't the crochet collar adorable?
Milk Box Socks
I'm not surprised that a shop with the name "Milk Club" has socks with cute little milk boxes on them~ I'm not sure why, but I really like clothes that have milk and fried eggs on them... I think they look so cute ;u; They have 4 different milk box sock designs, but my favorite would have to be the one with the red milk boxes~ I also think that the grid is really cute~ I'd probably wear these with my jelly sandals- since they're clear, the sock pattern would show up really well. And anyways, who wouldn't want cute socks?~
Little Twin Stars School Bowtie
I'm not sure if I've said this on this blog before, but Little Twin Stars is my absolute favorite Sanrio design. Kiki and Lala are just so cute~ I still have a small memo pad with them on it that I got when I was ten years old. These bows probably go great with seifukus, which I sadly don't have >.> I think they're adorable nonetheless, and would look really cute with any kind of shirt that has some sort of largeish collar (like a peter pan collar- which many lolita blouses have). I'm not a huge fan of the purple one however- the pink and blue ones are my favorites~ These aren't really cheap ($12.50), but I think it'd be worth trying out.
Lace Embrace Shades
Adorable sunglasses- perfect for summer! Or any time of the year really- whenever there's a sunny day~ You can choose what color frame you want, and there's also the option for different colored lenses (gold or grey). These are super adorable, but they're pretty versatile I think, especially if you're wearing clothes that have lace on them.
Dreamy Dolly Wallet
I've had the same wallet since I was ten years old... mostly because I haven't been able to find anything cute enough (my current wallet is dark pinkish/purple suede, and it has Charmy Kitty on it!). I love the look of this one- the lilac and pink and gold go together so well~ And the little teddy bear charm is so cute! This wallet comes in many different colors and it also has a lot of room for credit cards and that sort of thing (art store membership cards, expired coupons... whatever you carry around with you).
Phew, that was a lot of stuff!
Thank you for reading!
~Sakura
Which item was your favorite?
What would you like to buy?

Friday, June 19, 2015

Madonna Green Lens Review {Klenspop Sponsored}~

Hello hello hello!
Woohoo it's been less than two weeks since I've posted (unlike last time... oops).
Today I have a circle lens review for you guys! Once again, it's sponsored by the lovely online shop Klenspop, which sells a wide variety of circle lenses at very affordable prices- I highly recommend them if you're looking for nice circle lenses at a reasonable price!

I chose a pair of green lenses, since I don't currently have any. The pair that I got is the Madonna Green lens, and although the design is quite similar to the Geo Princess Mimi lenses in Apple Green (I'll actually be reviewing them soon!), it's a lot more wearable because the diameter is quite small.
Basic lens info (as always)

Brand: Neo Vision
Diameter: 14.0mm
Design Diameter: 13.5mm
Water Content: 35%
Base Curve: 8.6mm
Life Span: 1 Year
Price: $13.00 USD


The lenses came packaged the way that they usually do from Klenspop,


In the boxes were the lens vials, a lens case, and a pair of tweezers for picking up the lenses.
As usual~
This time however, the lens vials were in a plastic casing so that they don't wobble about, which I think was a great idea.
Here are some more photos of the lens vials~ They have a lot of Korean writing (which I can't read), but maybe it holds some useful information for those of you that can read it~


You can sort of see the design here~
Here are closeups of the lenses when worn in different lighting, as usual~

Window Light
Ah they're so pretty I love these lenses so much <3

Window Light with Camera Flash
You can really see how well the lens color fades in with my natural eye color; little specks of green float further in to the centre.
Just noticed that the righter looks much darker than the left .-.
Dim Lighting
Naturally, the color isn't as vivid this way, but you can still tell it's green!
And of course, full face photos~
 Since these lenses aren't super enlarging, I tried a much different aesthetic than I usually do. Normally I love the big eyed cutesy look, but lately I've been really interested in the super fashionable androgynous look, so I tried something akin to that. There's really no way to make my face look masculine, since it lacks angles (seriously ;n;), but I think the result was quite interesting~ These lenses really helped to emphasize my eyes without making them look too 'dolly'.


Derpy photo x3
(I used fake tattoos- here's a closeup photo of them cause I thought they looked fab~)

Anyway, that's it with a photos, now a few comments on the lenses.

Design
Although the color of these lenses isn't super natural due to the stark green and black, it does end up looking relatively natural since the lenses aren't enlarging. The diameter of the lens is approximately that of my iris, so the only thing that changes is my eye color, not the size of my eye. Due to this lack of change in size, the lenses are easily worn with minimal (or no) eye makeup. Thus, they're more practical for everyday use rather than super enlarging lenses ^_^

Comfort
The comfort of these is... well... it's not awful. The right lens was perfectly comfortable, but my left eye was so dry all the time! Whenever I blinked I could feel the lens sliding around and it was quite uncomfy >_> I used eyedrops, but they only helped temporarily. Maybe my left eye was being sensitive that day, but just in case, I thought I'd tell you guys.

Anyway, thank you for reading! I hope you enjoyed this review~ I definitely recommend these lenses for when you want to have a more natural look, but while still emphasizing your eyes and changing their color.
Ta-ta!~
~Sakura
What do you think of the androgynous(attempted) look? 
How would you style these lenses?